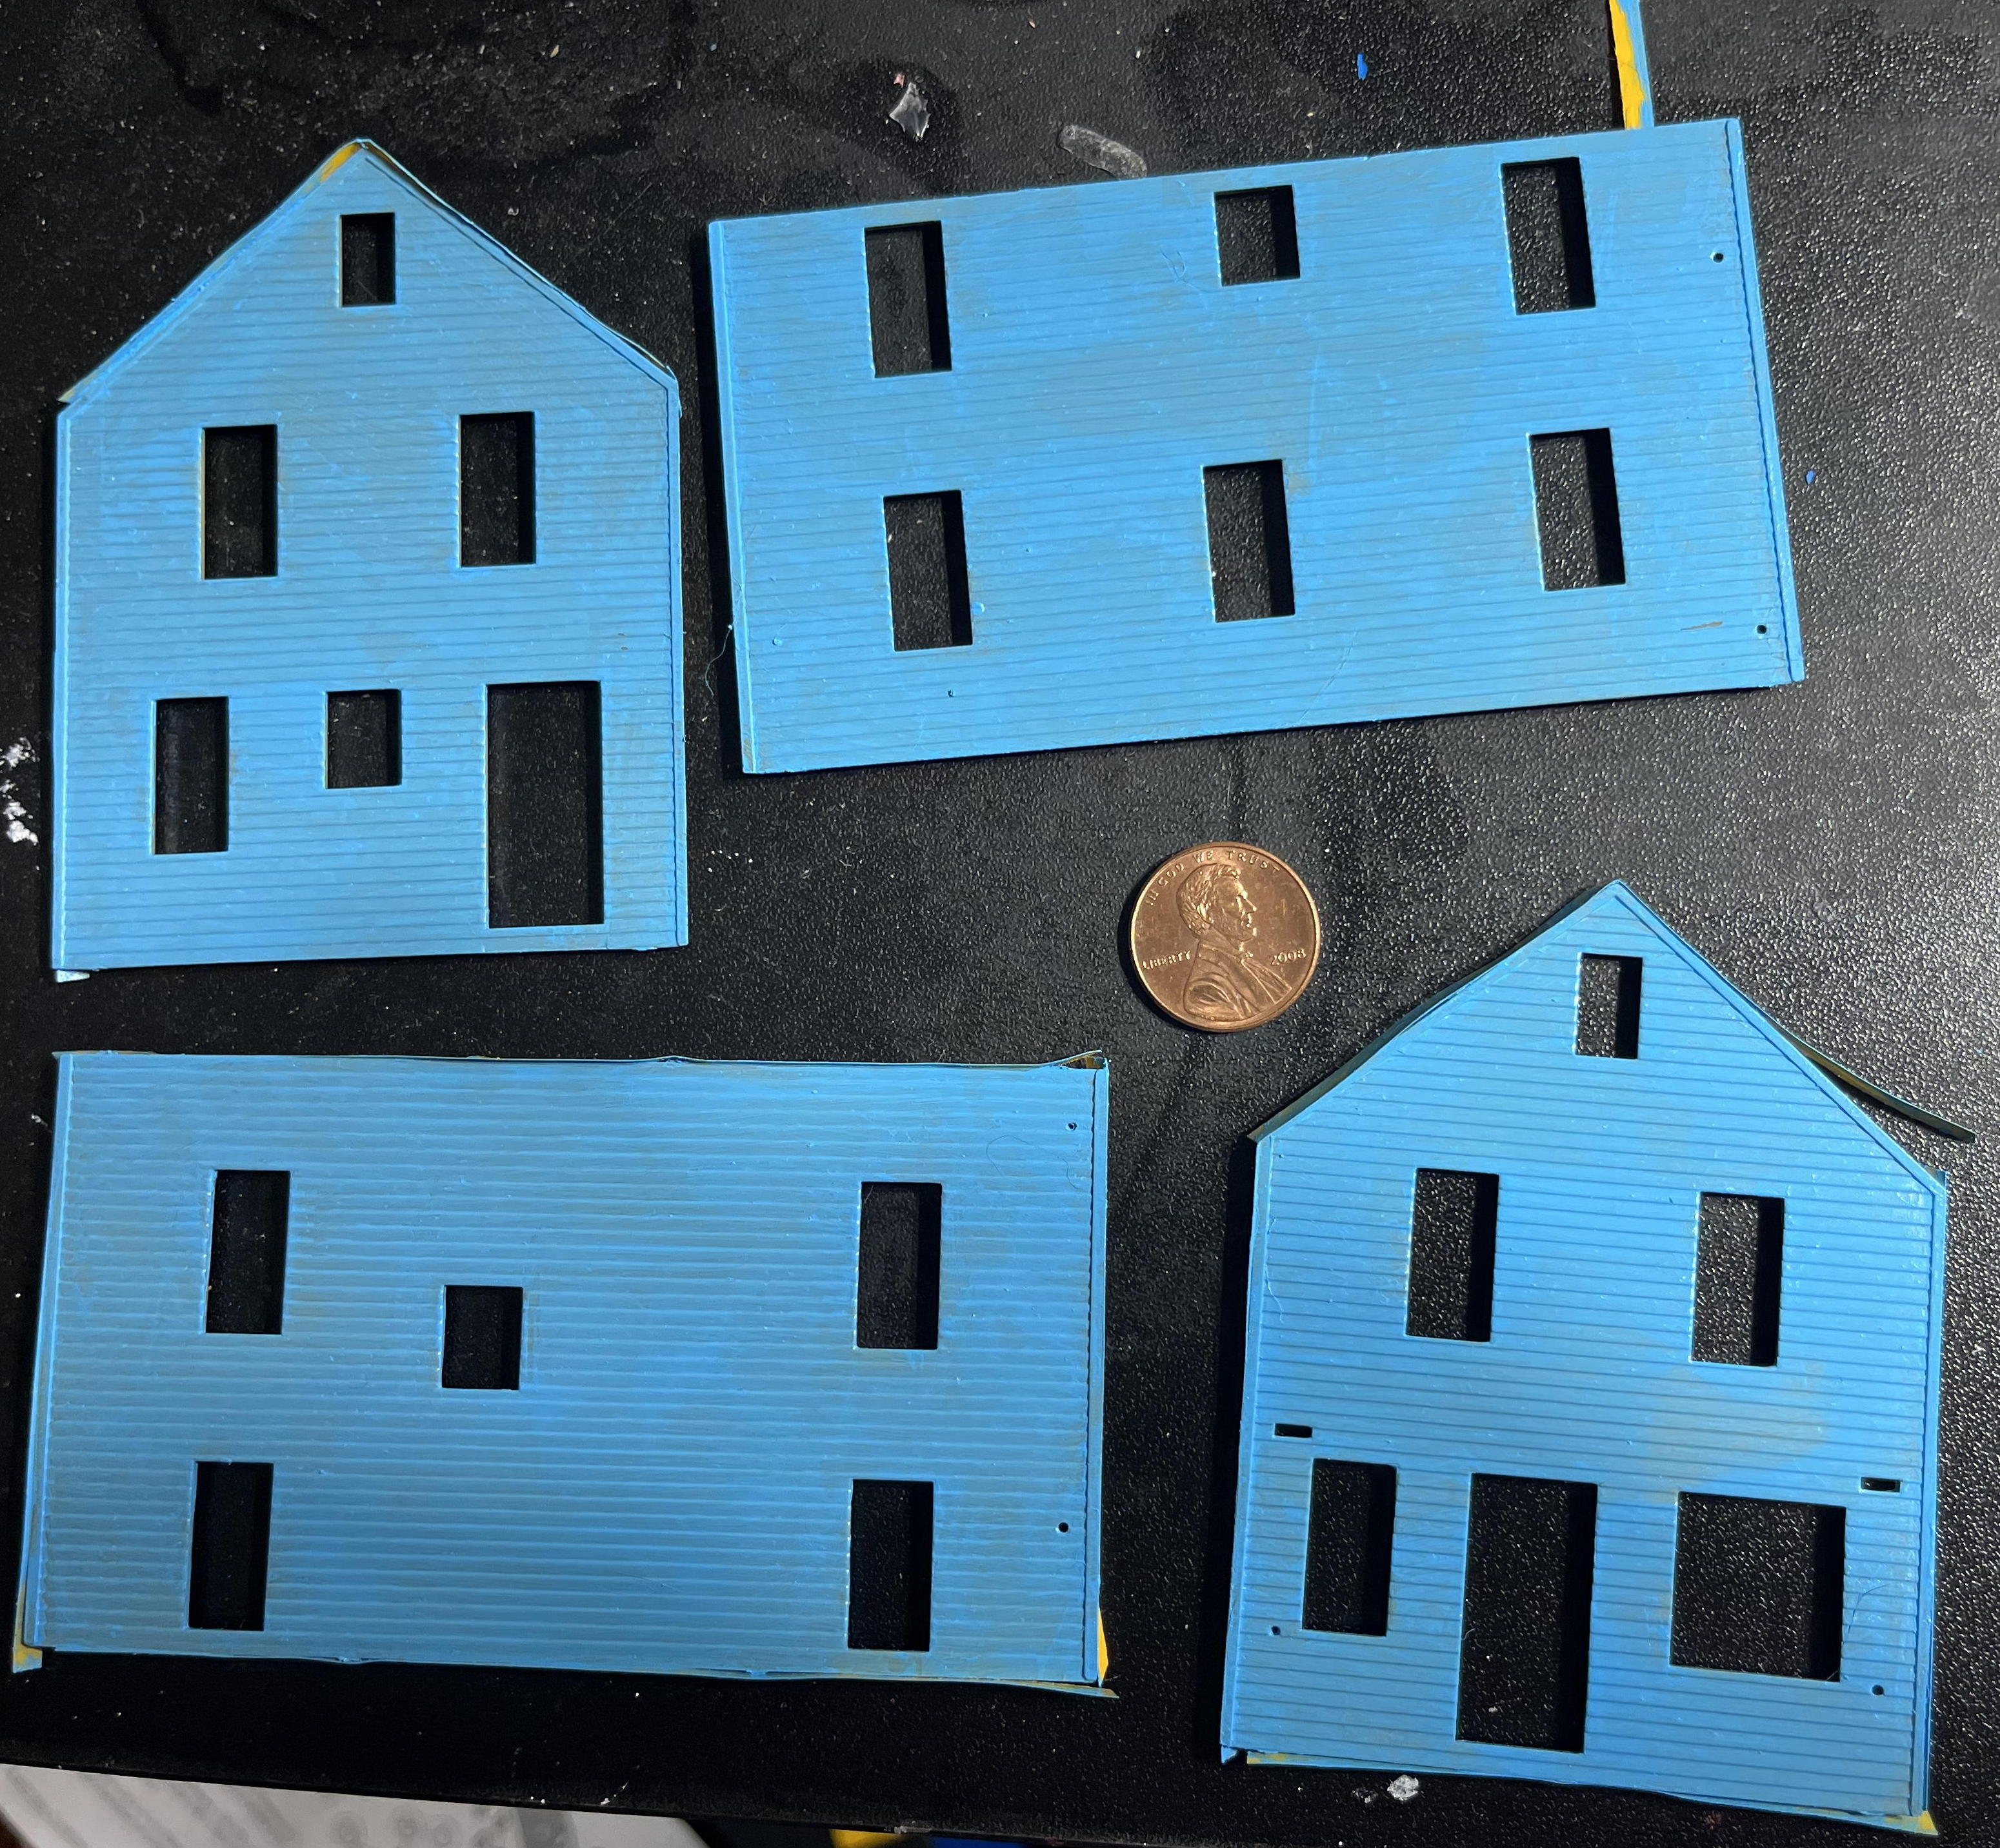
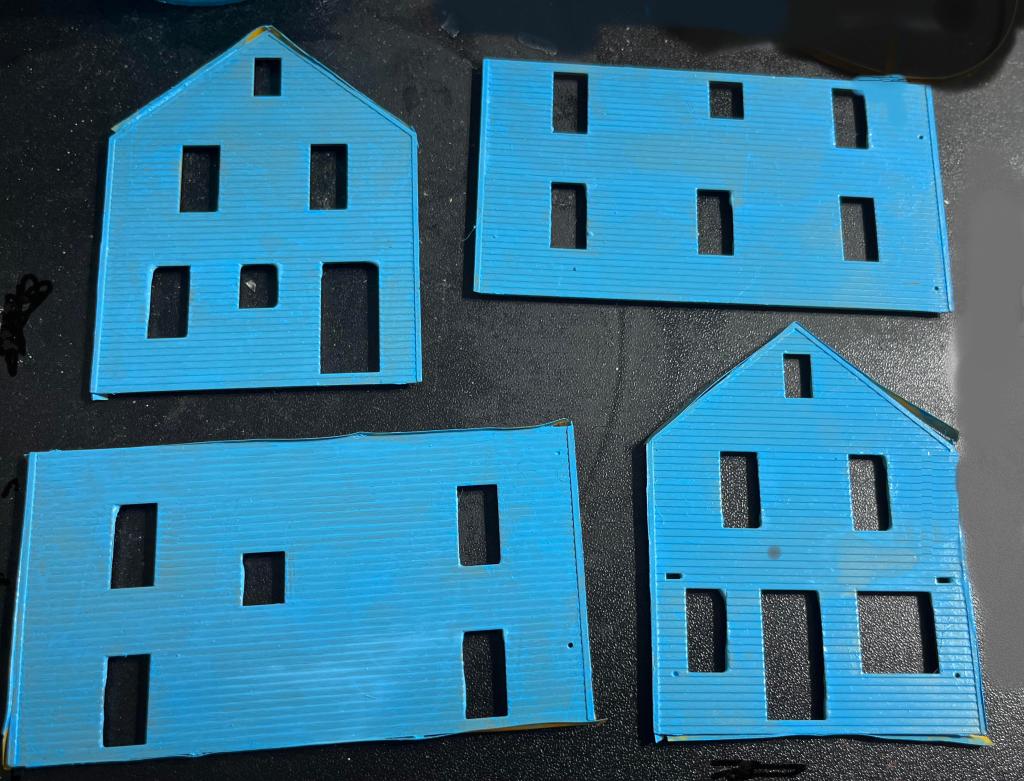
The trouble with photos like the one in the middle of last week’s post is that there is no way to have a sense of scale when you look at it. Just knowing the scale is 1:87 isn’t really any help. So the convention is to include a coin for that purpose. This version of the Week 3 photo might help you appreciate the level of detail:
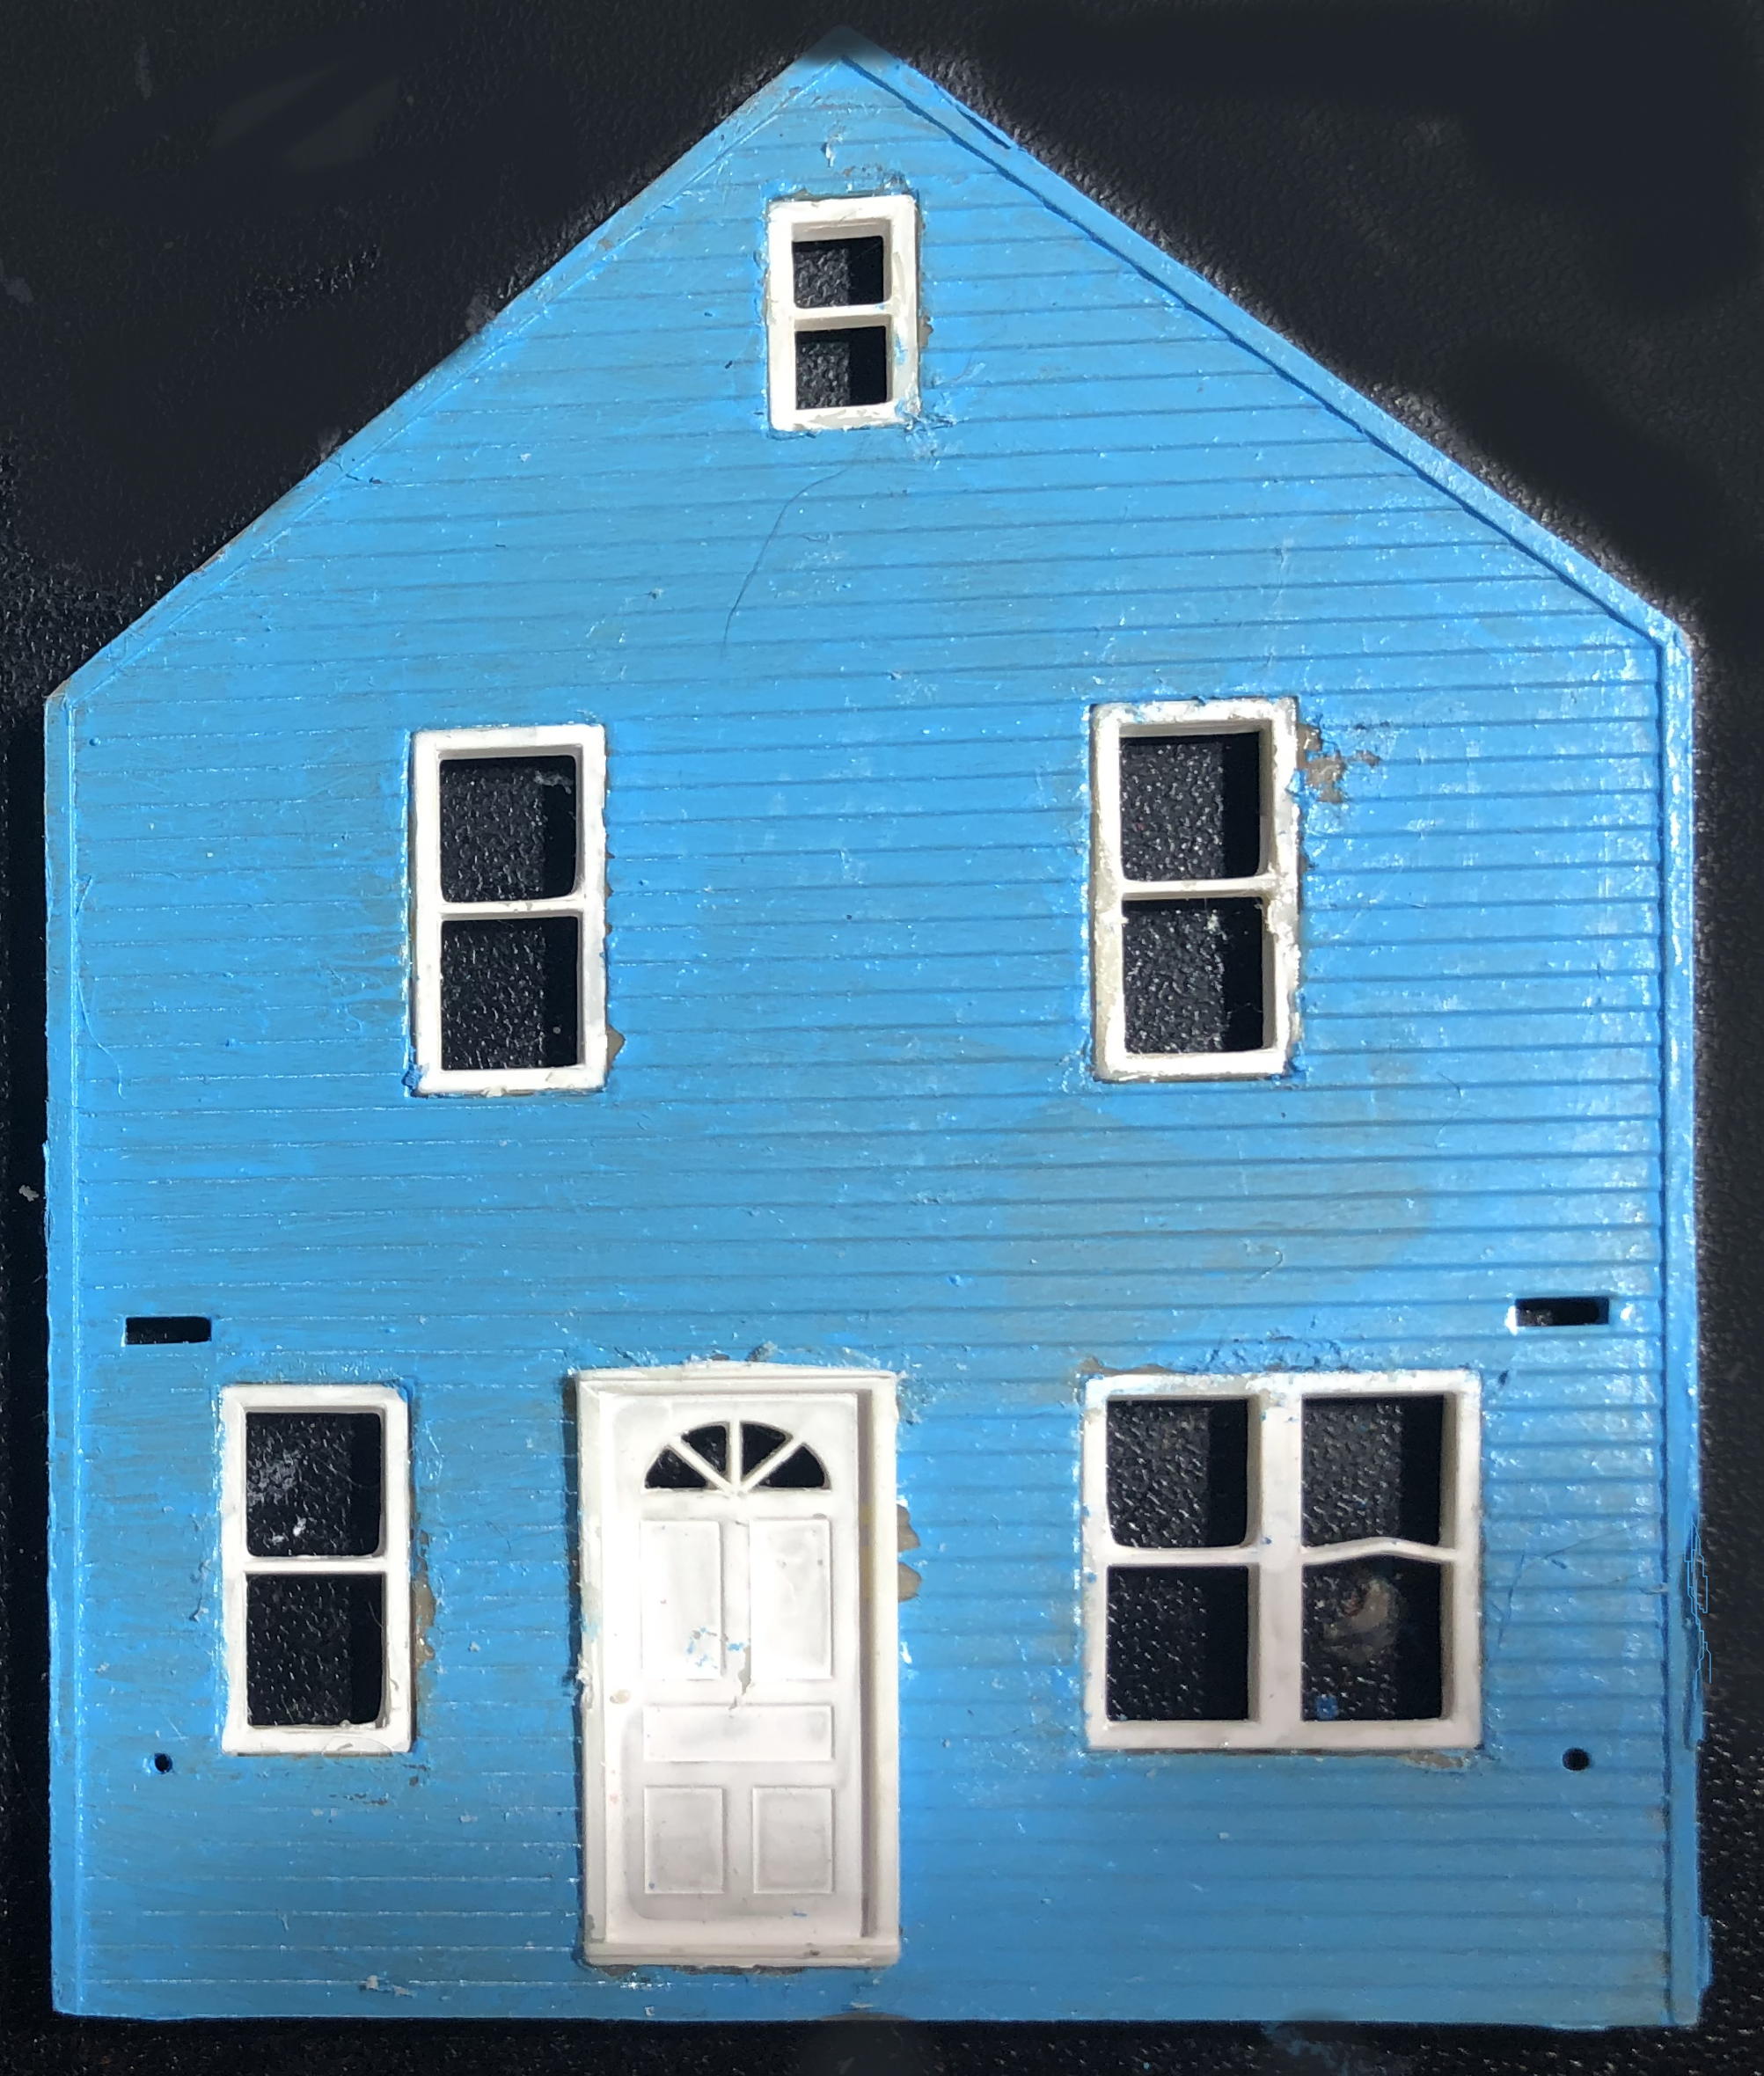
Now compare the front of the house from last week (lower right of photo above) with the front now (below right). Construction is not quite done yet, still needing simulated windows in the window frames, but it’s close. (I mean the front, of course, not the whole house!)
By the way, this is probably a good point for me to throw in an observation about “perfect” models vs. “realistic” ones. If you try to make your models look “perfect,” they will probably end up looking new and bright, plumb and square, clean and shiny. But that won’t make them look realistic, which is the goal! Go out and look at real houses. Imperfections, dirt, peeling, and other sorts of weathering all contribute to a sense of reality. Bright and shiny don’t.
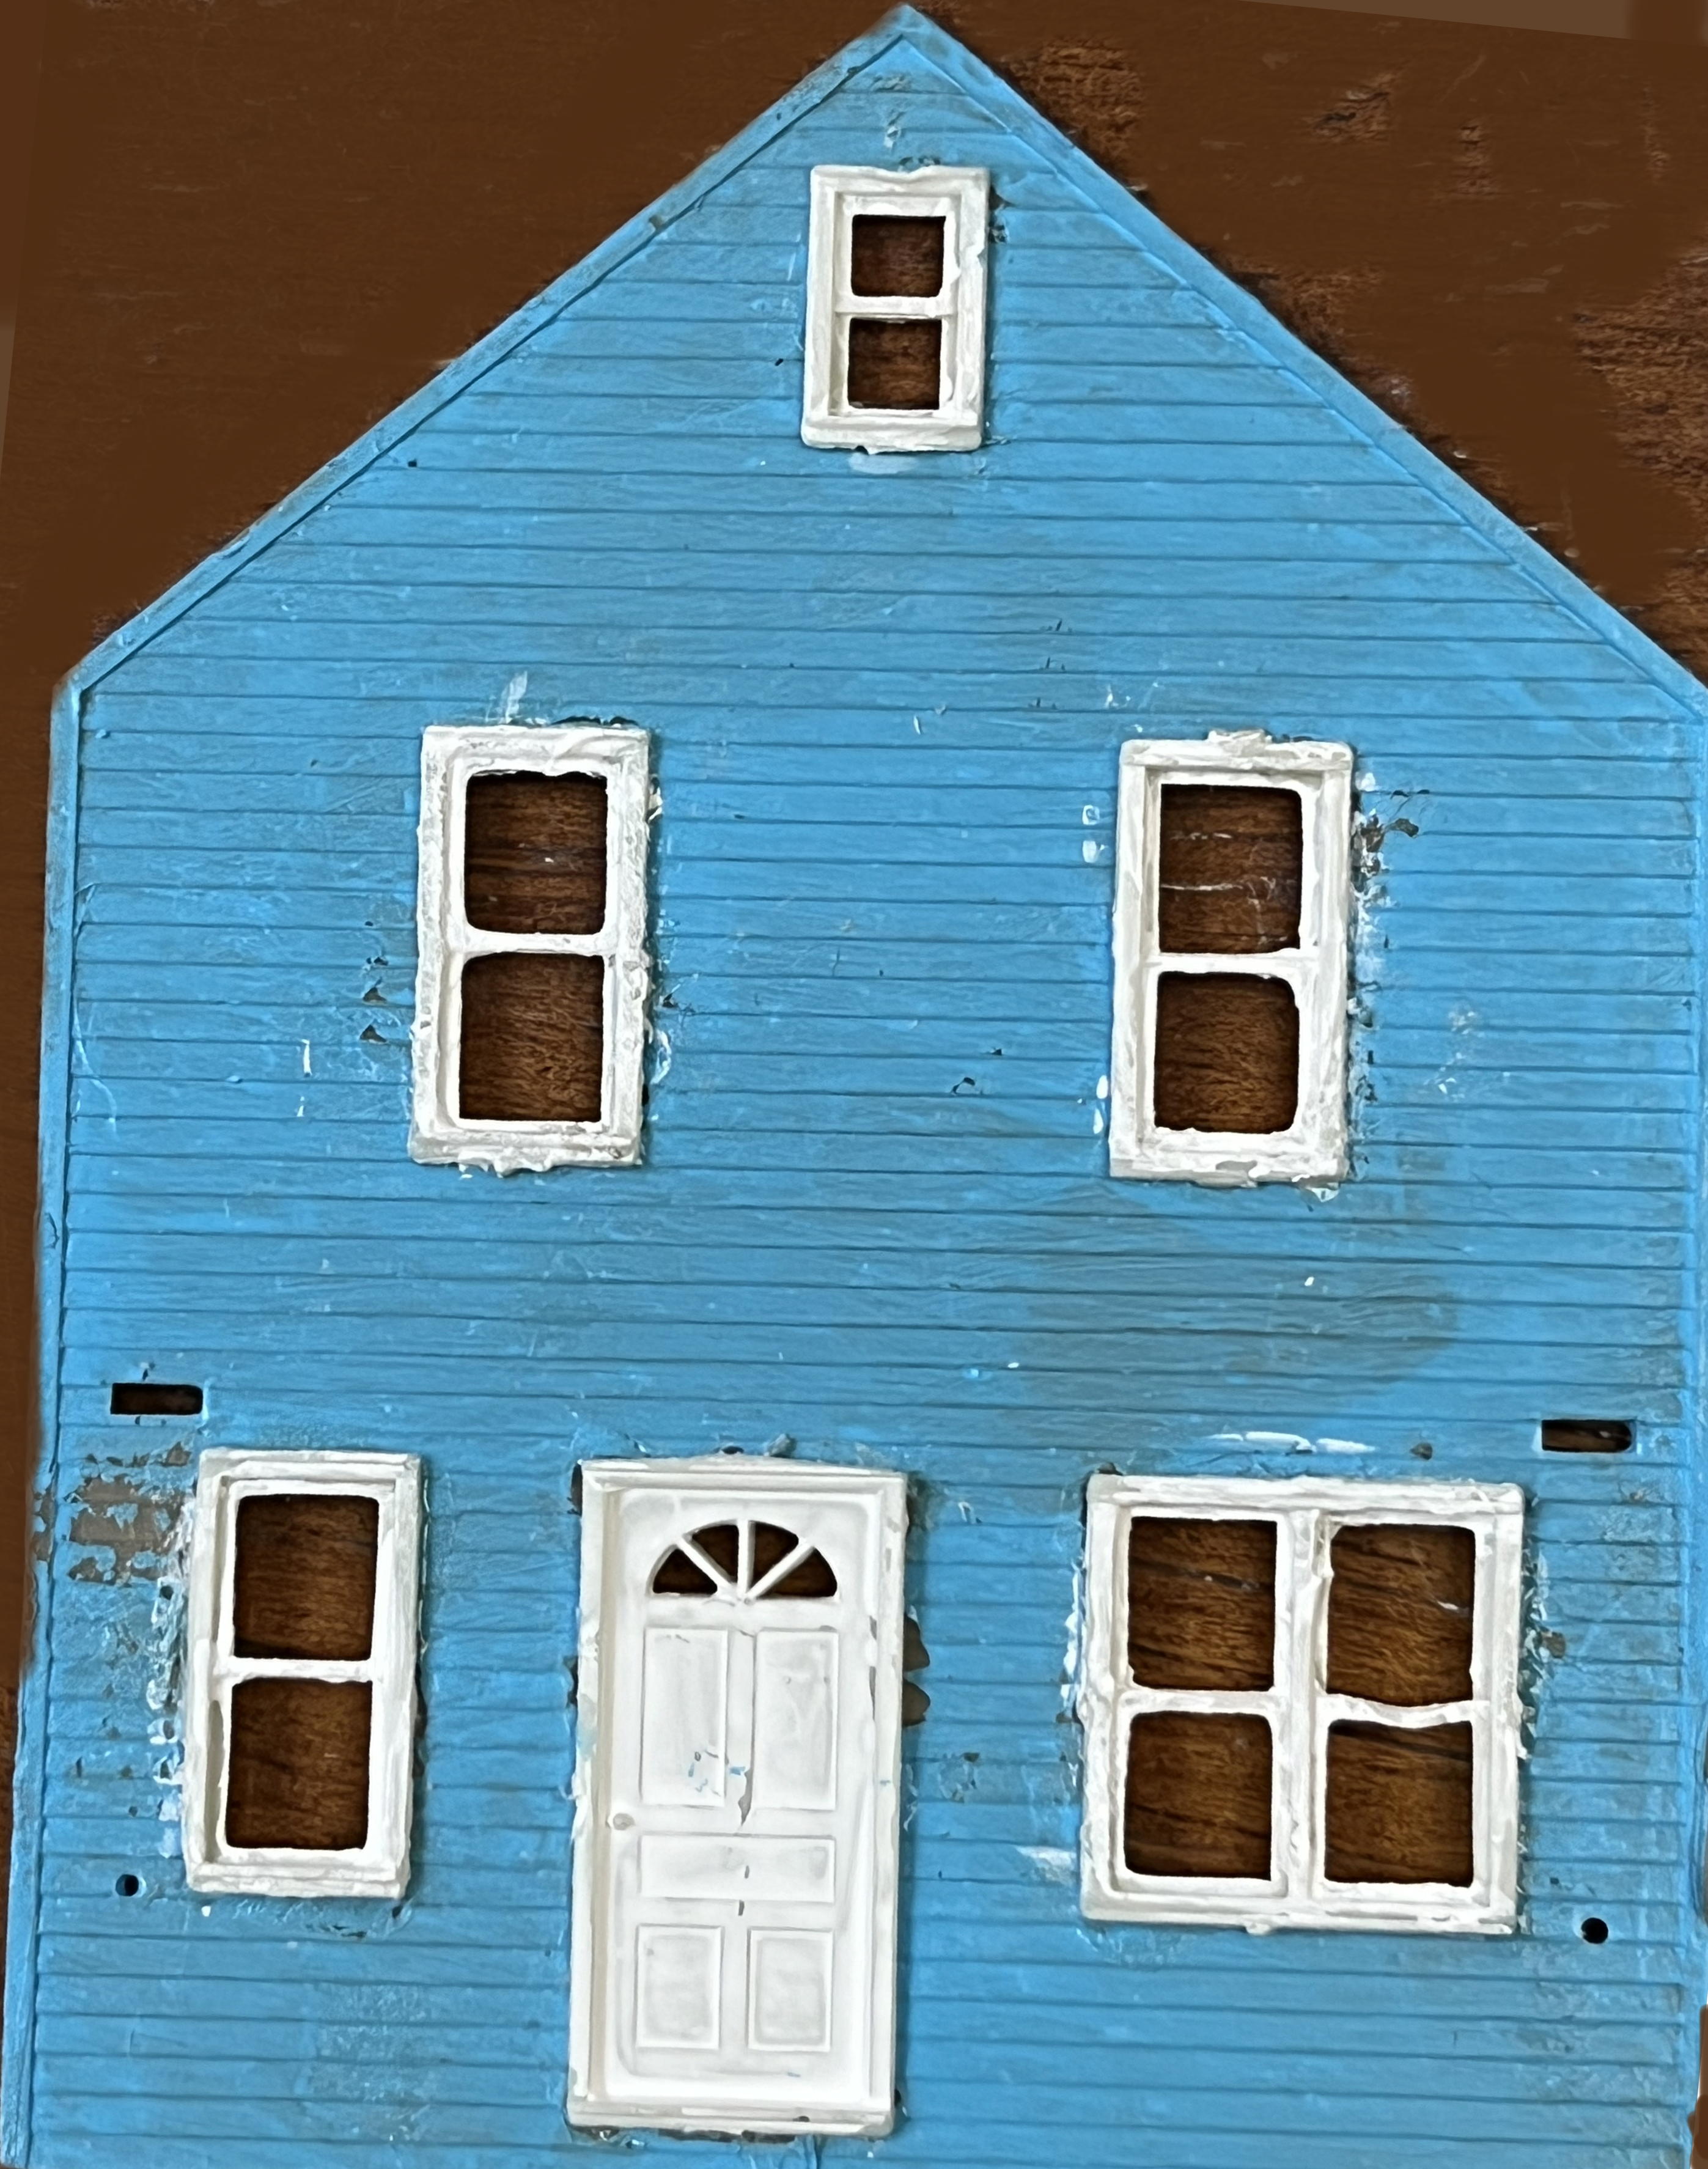
Anyway, it turned out that we had to redo parts of the house front. Here is how it looks now. Can you tell the difference(s) between the previous incarnation and this one? Ignore the background for now, since the photos were taken on different backdrops.
Categories: Model Railroading
